Creating a plain Eclipse project using JPMS and JUnit tests
27.07.2020 by Dirk OlmesI use the Eclipse IDE as my daily driver for development. For a long time I have ignored the Java Platform Module System (JPMS) which was introduced in Java 9 and I’m still ignoring it today. If you want a proper module system simply use the better one that has existed for many, many years.
One point I’ve always put forward when arguing against the use of JPMS is that there is no way to create a simple project in Eclipse that uses the JPMS and has unit tests as part of the same project - much like the project setup that Maven uses. Only today I found out that this is indeed possible if you know how to configure your project and hack your way with the module system.
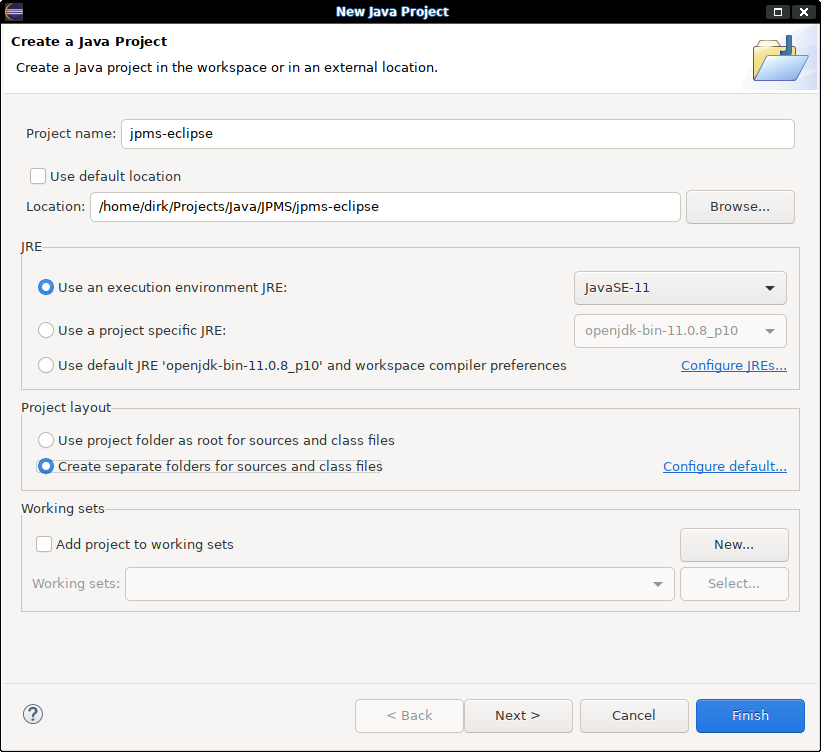
Let’s start by creating a plain Java project in Eclipse. Make sure you have a JDK configured that supports JPMS and create separate output folders for sources and class files.
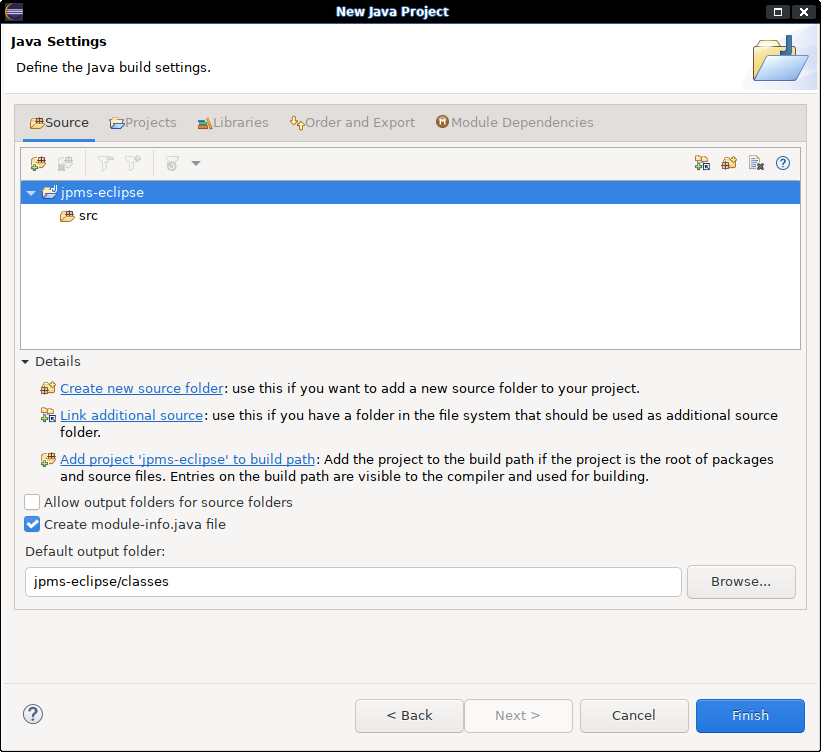
On the next page of the wizard make sure that “Create module-info.java” is checked.
When you hit Finish Eclipse will ask you for the module name of the project. Give your module a friendly name and start hacking away at your sources. Rather sooner than later you’ll get to the point where you want to add tests for your code. Add a new source folder that will contain your tests. Configure the source folder for your tests to generate its class files into a different folder and make sure you trigger Contains tests sources.
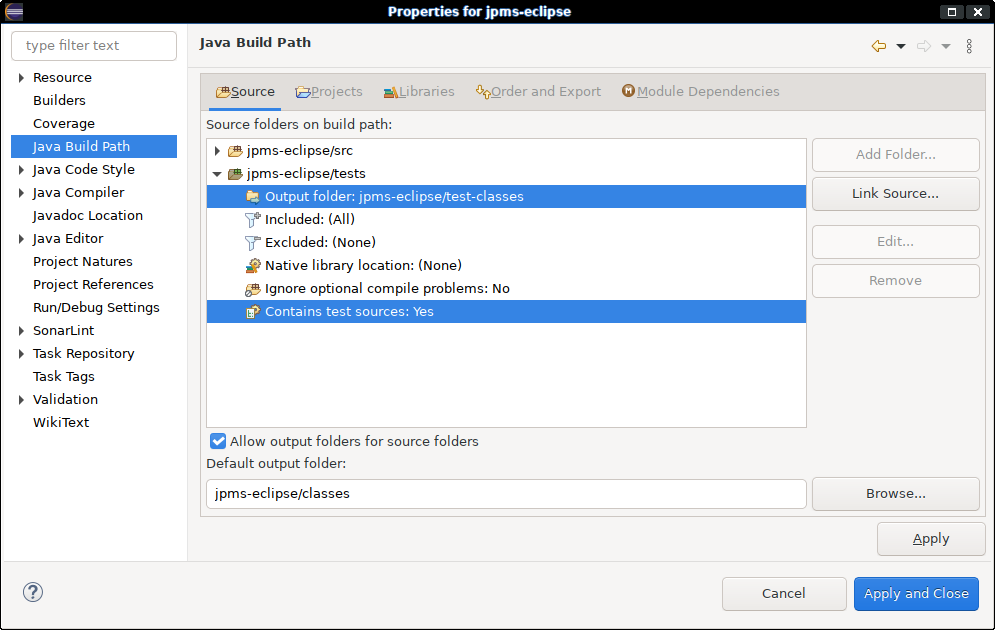
In the Libraries tab add the JUnit library to Classpath section, not to the Modulepath section.
This hack enables the JUnit classes to be found for compiling and running the unit tests. But you’re not required to put the JUnit module into module-info.java, leaking the JUnit dependency out into the module path.
Comments
There are no comments yet.